Amy S. Davis Photography
Contact me at:
AmyS.DavisPhotography@gmail.com

Like my facebook page:
www.fb.com/AmyS.DavisPhotography
  • Home
  • About Amy
  • Blog
  • Portraits
    • Children
    • School Portraits
    • Romance/Couples
    • Bridals
    • Families
  • Events
    • Travel
    • Sports
    • Holidays
  • Front Porch Photography
    • Seasons
    • All that Grows
    • Furry Friends
  • Contracted Work
  • Products
  • FAQs
    • Prices
  • Contact Me

What to Photograph and Other Tips for Photographers

9/11/2013

0 Comments

 
I had the wonderful benefit today of being asked to give a private lesson to an upcoming photographer. Naturally, I was completely honored and still a little surprised that my work was seen as professional enough to be asked about all my little tricks and secrets. After giving her some advice that I had to learn the hard way, I liked feeling as if I've made a little difference. At least I hope I did. Photography isn't one big secret or an unobtainable goal. Yet, nothing really is if you have a passion to learn and understand it. I've always liked taking pictures even before I ever owned a digital camera, but I never had a passion for it until I realized that it was actually in my reach to be good at photography. I'm my own worst critic and still see a ton of room for improvement which I will probably ALWAYS feel. Even some of the best photographers in the world need to a goal to work towards, which is usually improving on some skill or technique. 

Nevertheless, I wanted to share some of the advice that I gave this excited but slightly overwhelmed lady.
She explained that she was looking to make her photography more than just a hobby and didn't know where to start. For many people, this starting point can be different. It may come as common-sense to some and others may really be at a loss for where to turn. My advice to her was to set a few goals for her photography. Start by looking up photographers that you admire. Look at their work. When I was a student in architecture (yes, I really had no idea what I wanted to be when I grew up, lol!) they would call these precedent studies. Depending on the project we were assigned, whether it was to create a museum, construct a water tower, or design a house, we were assigned to precedent studies. Researching previous works (and I mean good quality works too) will give you a goal to work towards. I would even recommend replicating that work in your own way if you can. 
Picture
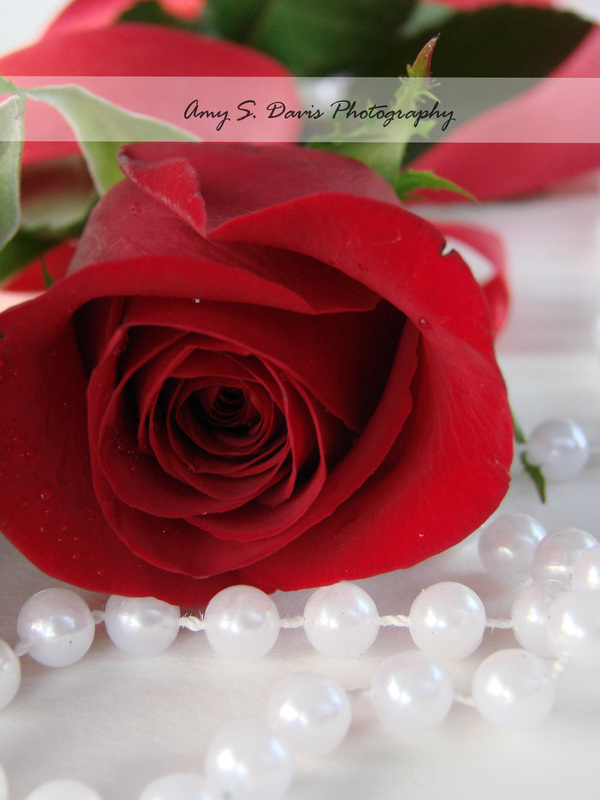
I found this image at http://miskamiller.blogspot.com/2010/10/miller-family-has-grown-by-two-feet.html It's a beautiful photo that she has taken. I liked the idea of using a family's feet. So I did my best to recreate the photo in my own way. 
Picture
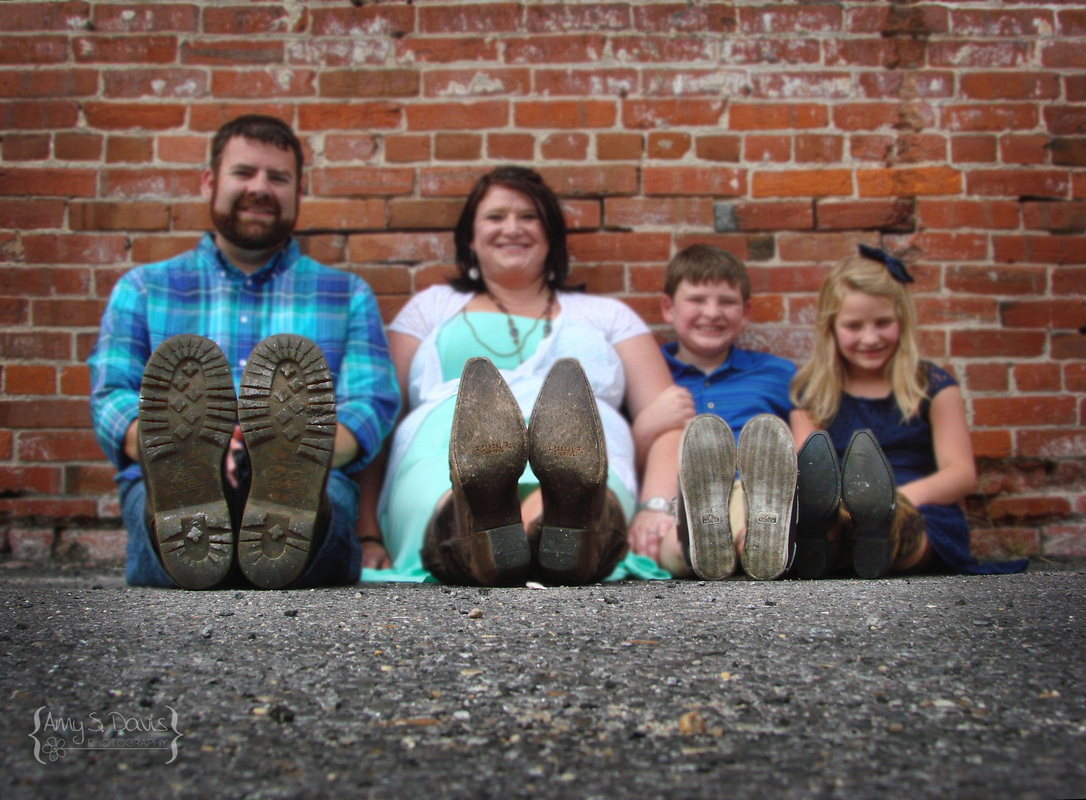
The photo is different, but still has a similar theme or central pose/idea. 

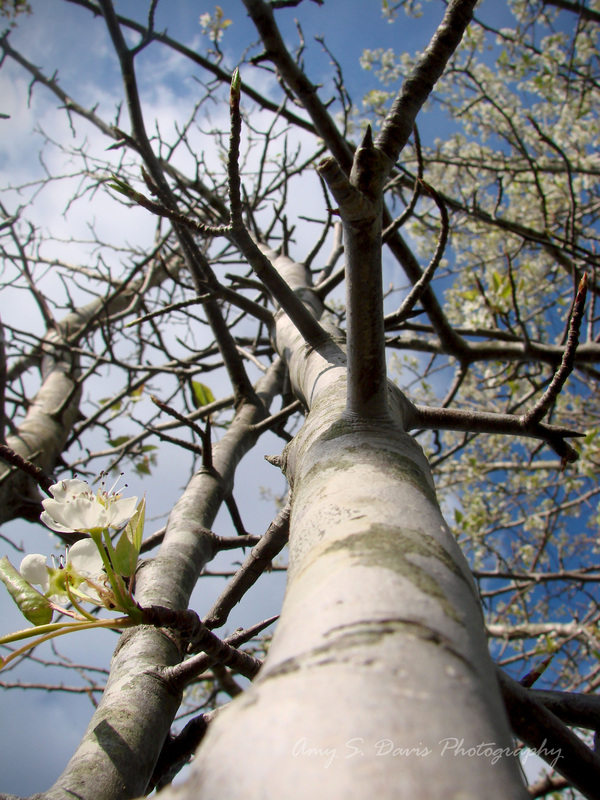
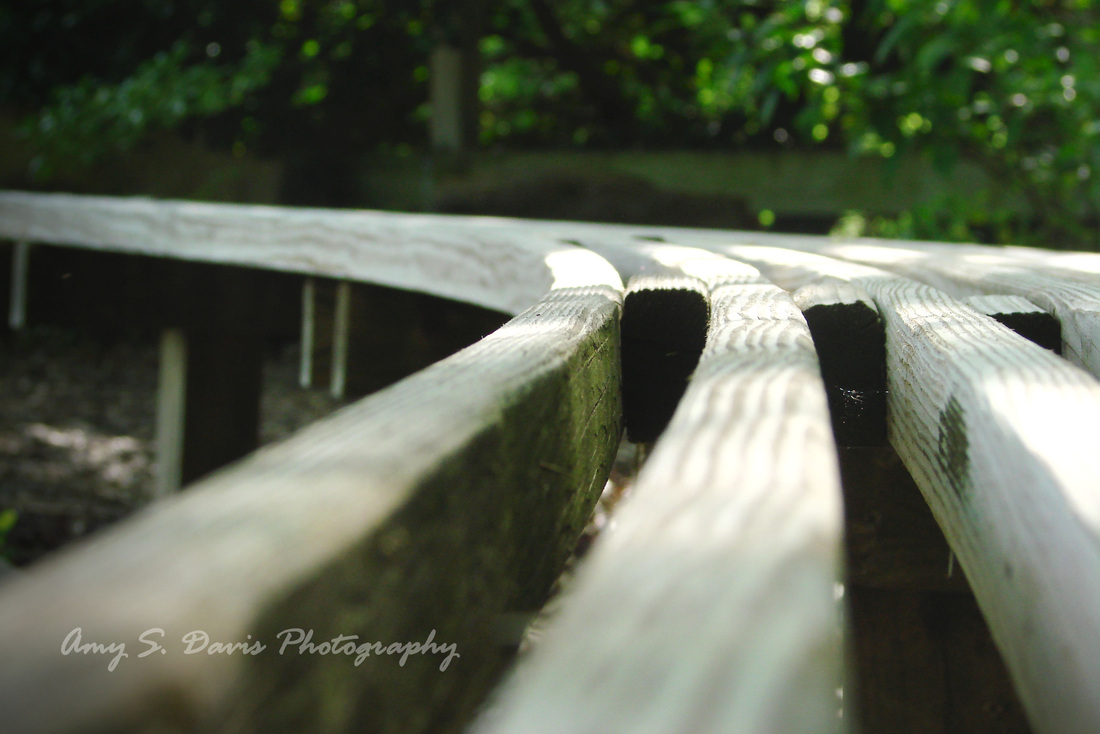
One of the greatest tips I can give a blooming photographer is to find something unique. Make your photos stand out. I can look through my arsenal of images and give you tons of examples of why I took that image. For example, in the photo below, I found a tree that had carvings all over it. It was unique. I could have picked any other tree in the area, but this one stood out. 
Picture
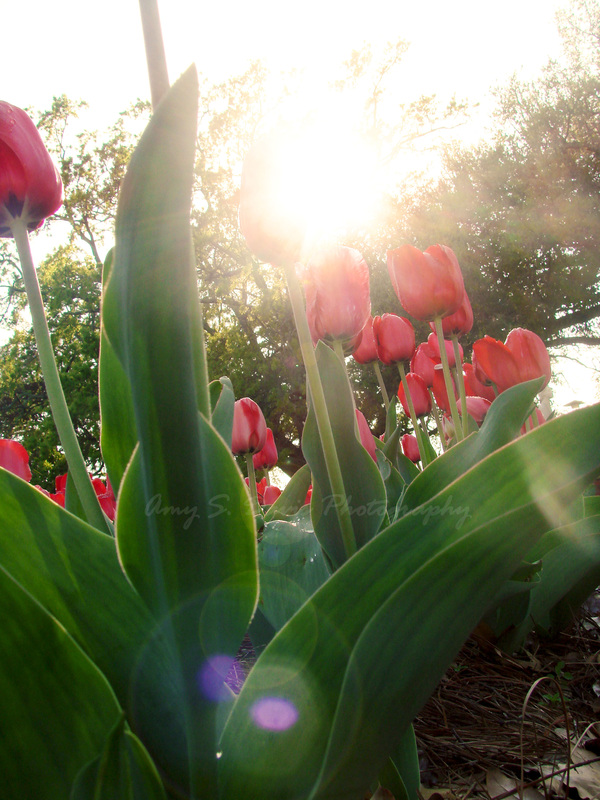
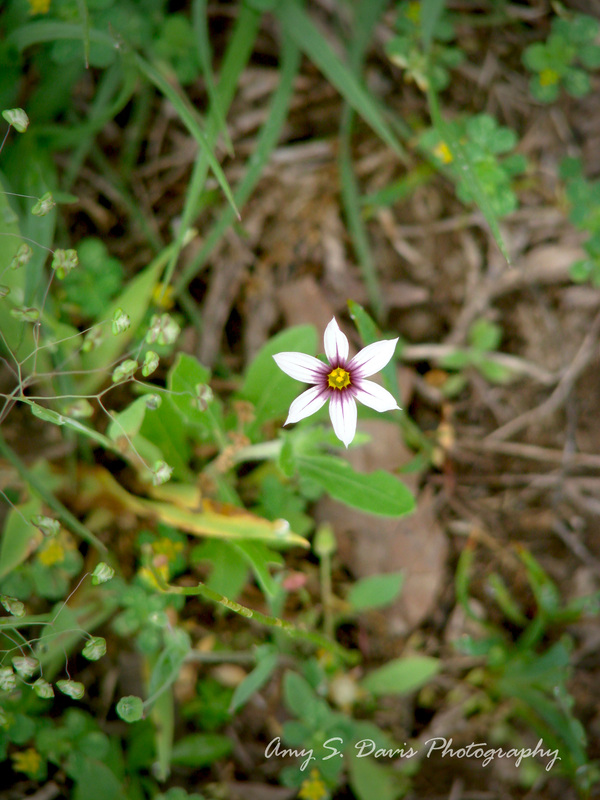
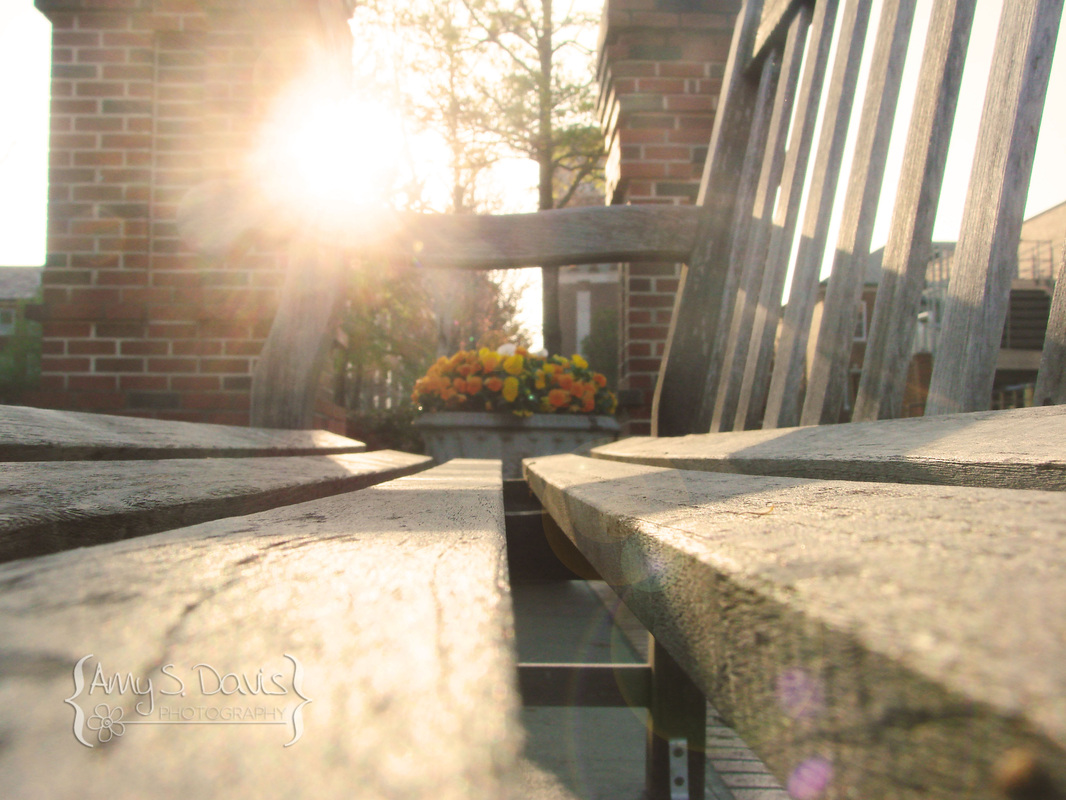
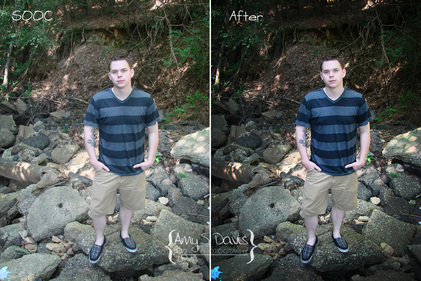
It adds just a little more character to her photo. If you aren't photographing people and think, well I suppose I could go take a picture of this flower for practice, try different angles. Picture what it would look like from underneath, straight above, or even directly beside whatever you are photographing. This doesn't really work as well with people, but it makes nature photography very interesting. 
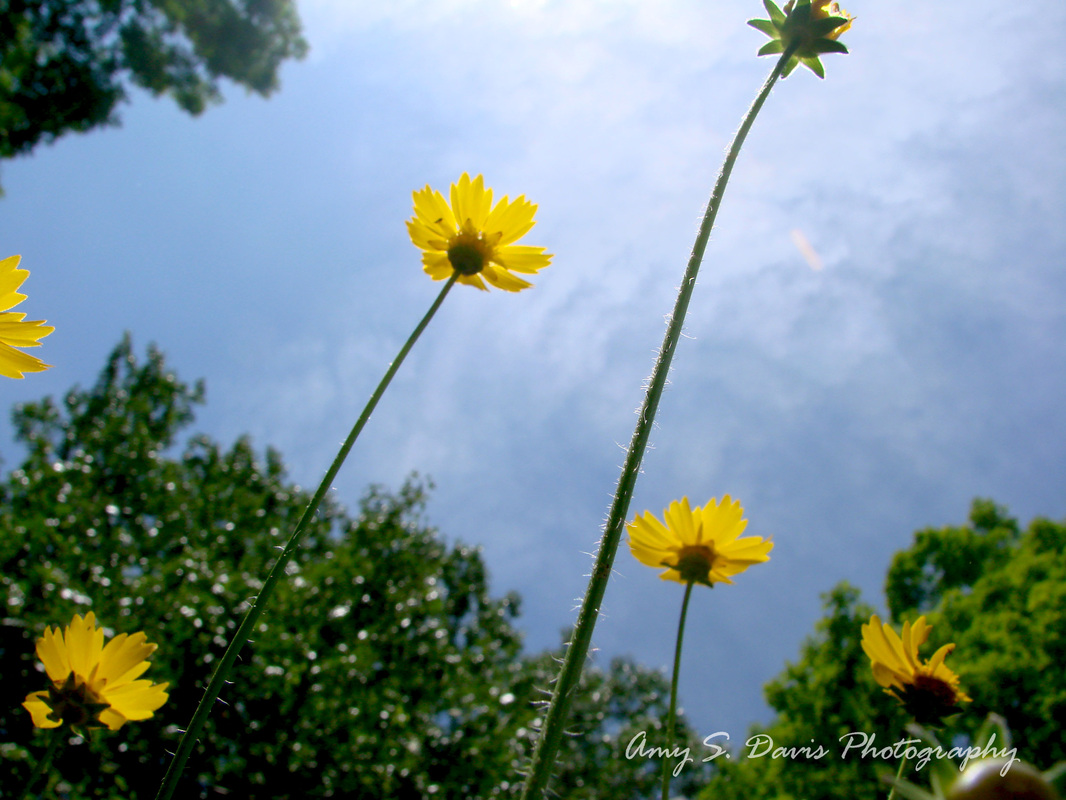
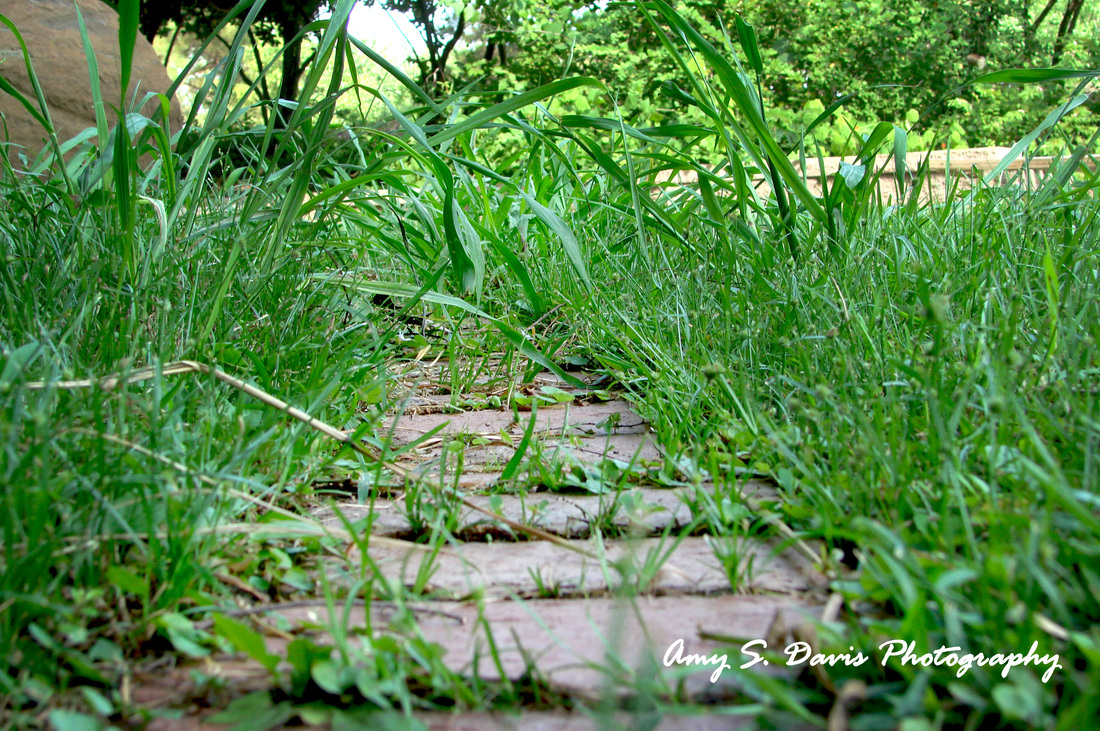
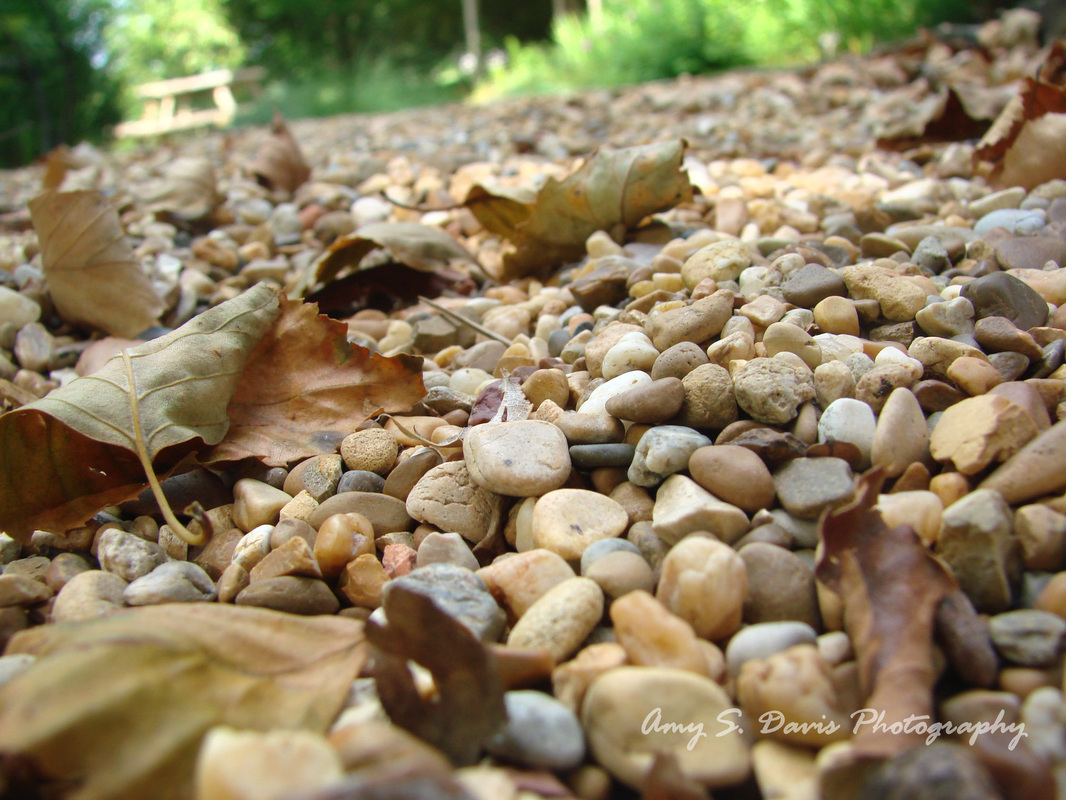
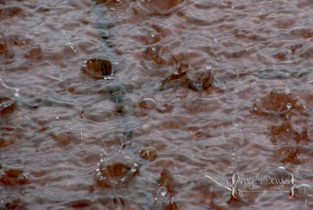
Angles of things can make an image very exciting and really pop too! It can leave your photos unforgettable or even a little mysterious. This is especially true if you have zoomed in to something. Macro images are some of my favorite types! I could have held my camera at eye level and looked down at the stones or grass and shot from above but it makes the image so much more interesting if I can look at it from a way most people don't see. 
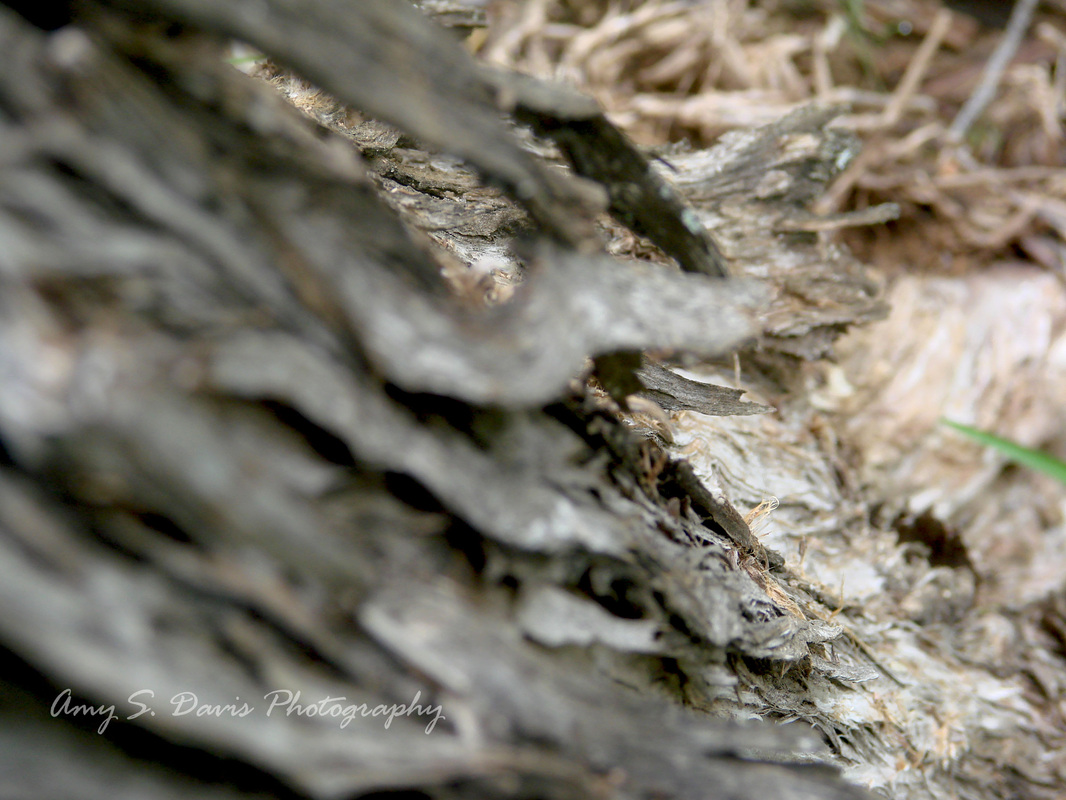
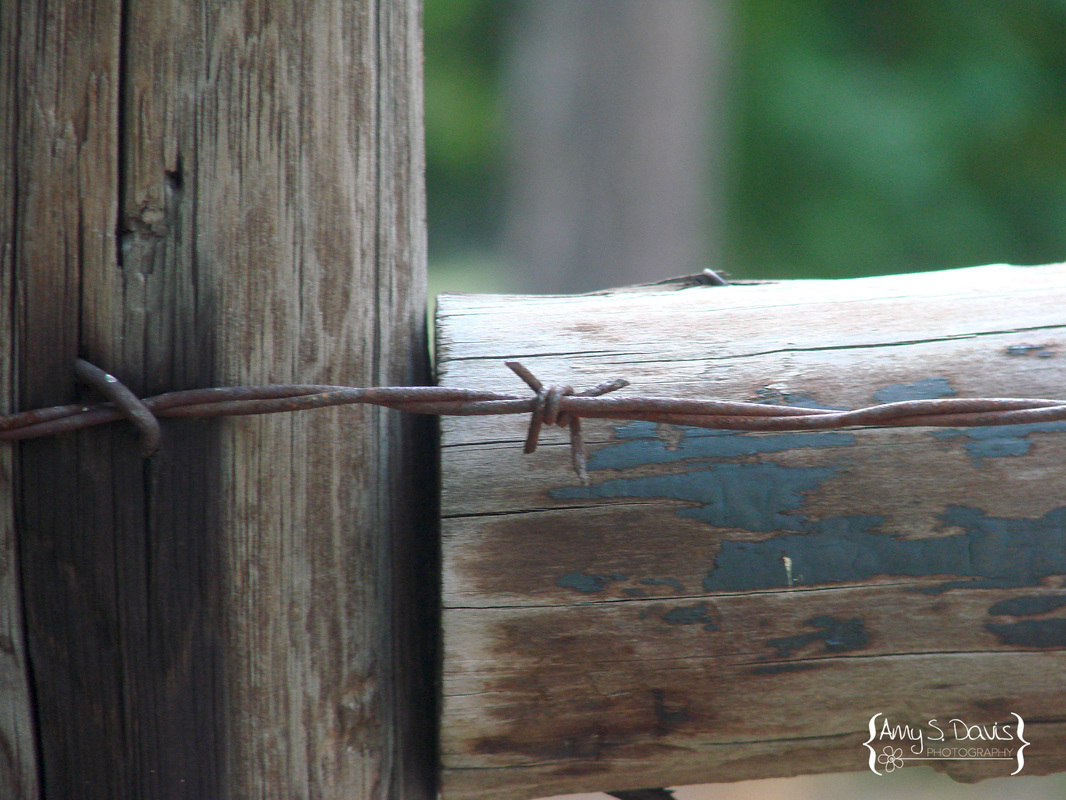
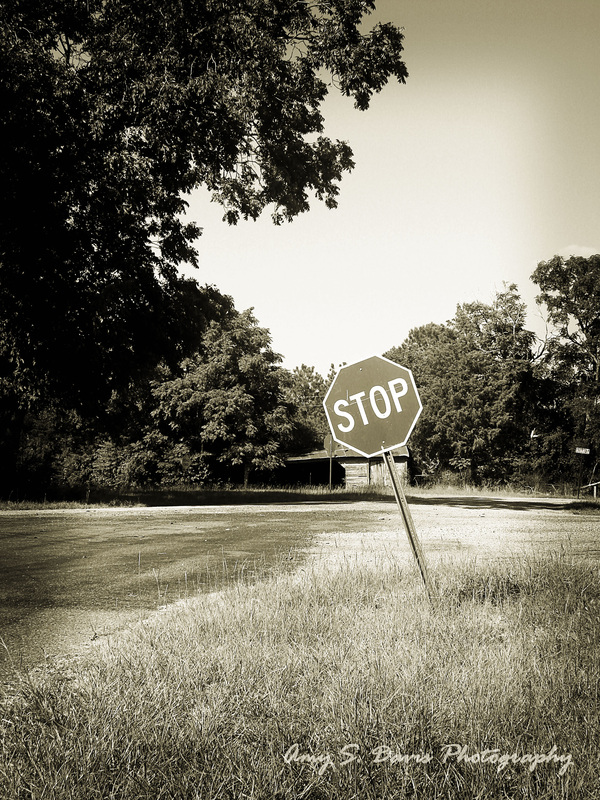
Let's not jump ahead though. It's also important to find interesting THINGS to take pictures of as well. People like to look at people, that's true enough. But what about things? I could sit here at my desk and take a picture of my keyboard if I like, but would that make for an interesting photo? Maybe if I was creative with the angles or other elements of that nature. OR I could go out and find something that most people don't notice or see very often. It strikes intrigue into what you are photographing. How many people really stop to look at a fence post? But I was drawn to it because wood has great texture and rich colors. 
Picture
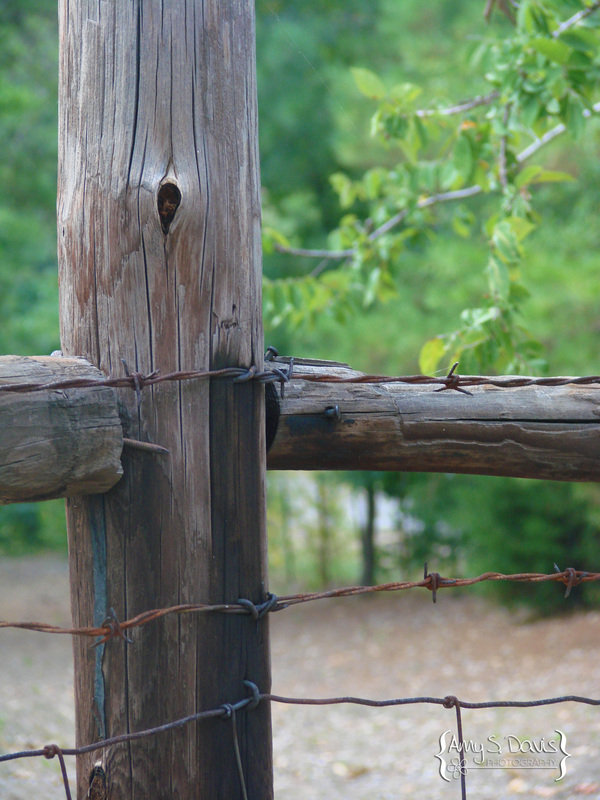
Or we can zoom in even more and look at the barbed wire. I like this image because it shows such a great contrast between the rusty metal and the old wood. 
Picture
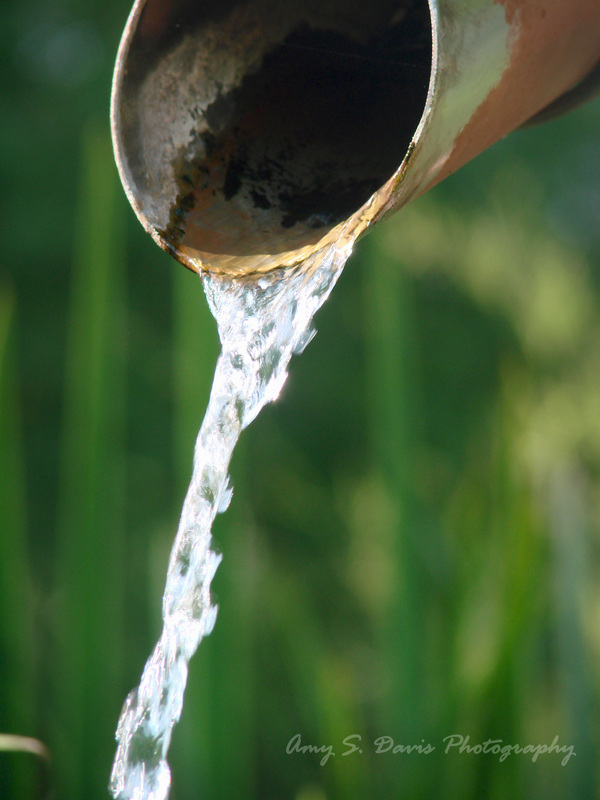
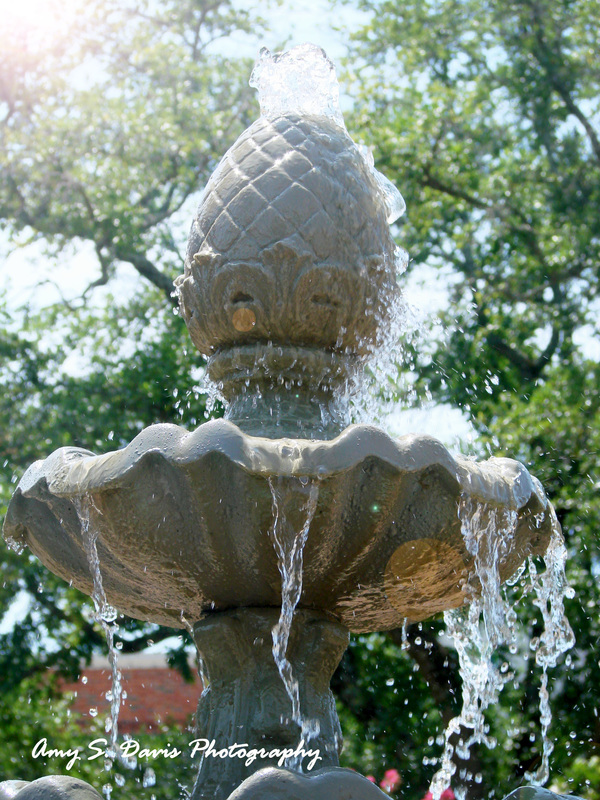
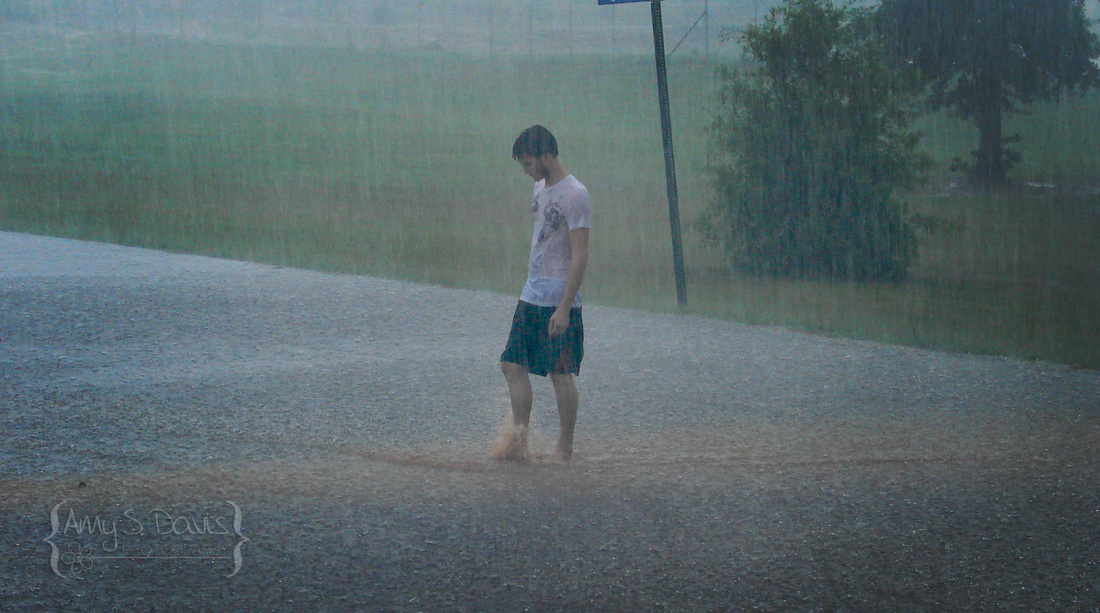
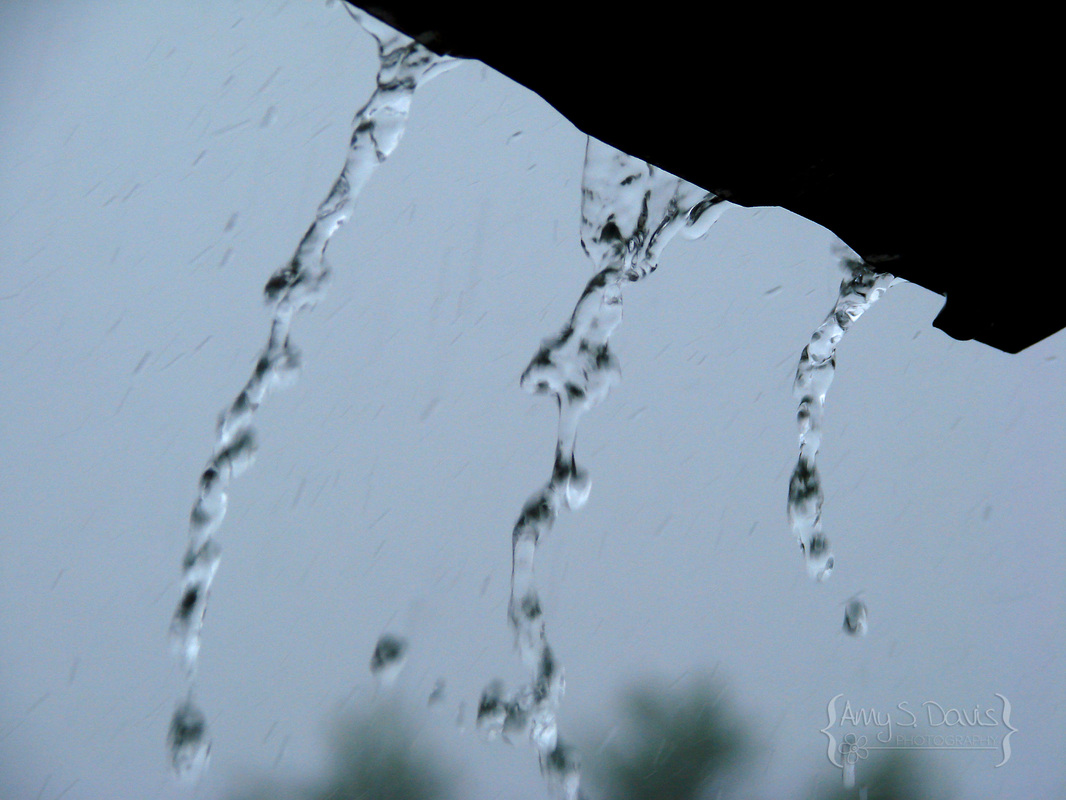
Yet, I have people say, well Amy that just isn't interesting to me. To which I would reply, GREAT!! If it was interesting to everyone, we would have pictures of fence posts everywhere and would defeat the purpose of it being unique. Maybe you prefer capturing the movement of water like in the image below?
Picture
Maybe you prefer something different like in the images below? I wouldn't say these are all super interesting, but some people may prefer the photo of the cake over the photo of the eight ball. To each his own. 
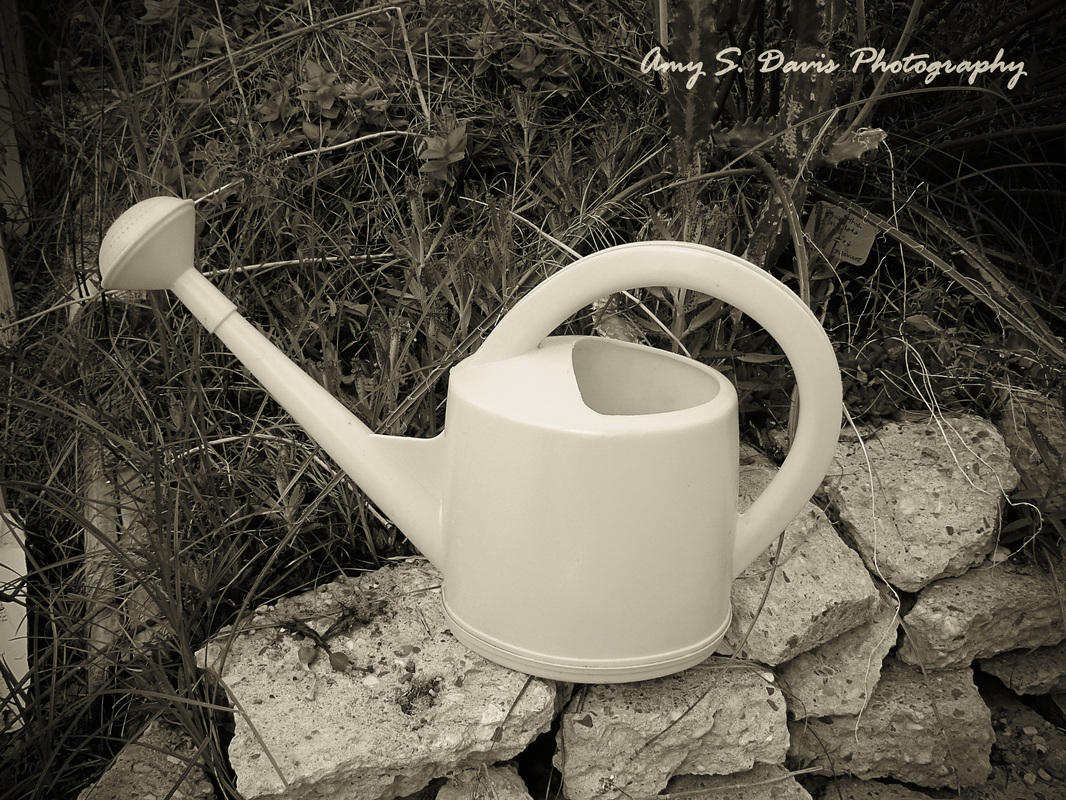
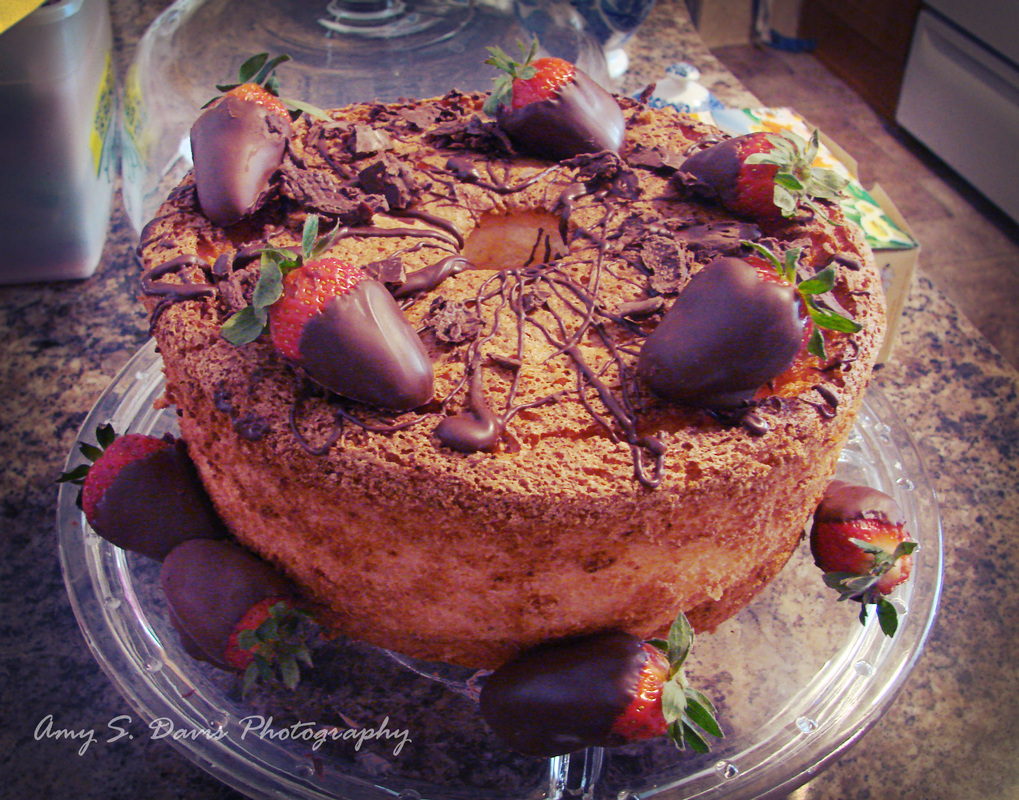
However, I took each of these images because I was learning what I like to take pictures of, which turns out to be things found in rural areas in case you are wondering. Some people like food, landscapes, every-day items, or any number of things. The trick is to make it interesting. Adding a variety to your portfolio will increase the chances of gaining supporters as well as increasing your skills at photographing things outside your comfort zone. 

I ended up giving that lady a bit more advice, but I'll save that information for another blog. I got kind of long-winded in this one I'm afraid. Nevertheless, I hope it has helped some of you. I did want to post that I ran across an article that may help those of you who are passed this point and are looking to make your hobby an actual business. It's not a long article and gives some sound advice. It's written by a photographer named Veronica Gillas. You can find the link here: 
http://www.mcpactions.com/blog/2013/09/11/5-steps-successful-photography-business/

Good luck! 
-Amy
0 Comments

The "After-Shoot" Process, aka: Post-processing

8/19/2013

0 Comments

 
I've slowly become aware of how little people know about what goes on after a photoshoot is complete. Why I haven't blogged about this before now is maybe due to the fact that I was not aware that many clients and other people who do not take photos on a professional scale realize just how much goes into editing images after they have been taken. Now of course, this does not apply to every client's photos or every style of image. There have been many images I have taken that are just exactly how I want them coming straight off of the camera. We call these images SOOC. I have had many that I simply slap a watermark on and upload to my website or facebook page. The image below had no post-processing. This is what the image looked like exactly as I took it, the only addition was my watermark. 
Picture
However, these are typically not pictures of people, and if it is, they are rare. Most times, one image takes as long as half an hour to an hour just to get the quality and look of what I want in the final image. 
Picture
You have to understand though, most photographers do not like sharing their SOOC images for a multitude of reasons: their images are low to bad quality and they rely on an editing software maybe more than they should, the product they offer is one that is more prone to editing (which is okay if that is what the client wants or likes), they do not want to give away their editing techniques and secrets, or to dissuade unprofessionals from trying to copy or imitate their work. I'm sure there are other reasons, but that's really not the point of my blog today. 

The image below is one that I found online (NOTE: this image is not mine. I do not own the copyrights to it). The image can be found at: http://www.bloomandgrowphotography.com/2011/08/bloom-grow-actions.html
This image is of a newborn, which fyi- takes a TON of editing just because a newborn's skin is typically so rough, pink, or transparent. You'll notice the lighting has changed, as well as the baby's skin. Also, it seems the photographer has edited out part of the top right image, which can also be time-consuming if done properly. 
Picture
To illustrate this better (and since this IS a photography website and most of you like to see photos) I have recreated some of the steps I go through to show you just how I get to this process. I'd upload a video, but alas... my new computer does not have the software yet required to record all my steps. So screenshots will have to suffice. For my purpose, I'm going to go through and edit one of the images that I feel needs a much bigger change. The end result will be more dramatic so that you can tell what I am doing; however, this does not necessarily mean that it takes more or less time. It just means I am exaggerating my steps a bit more so that they are more noticeable. 
My first step is to decide how I want the image to look... black and white or a more blueish hue? I don't have to decide yet, just have a goal to work towards. I want something that will pull the eye to the model, particularly his eyes (or maybe his senior ring since this was a senior portrait). I have cropped the image so that you can see the timestamp on each. That gives you a general idea of how long it takes me between each step. You can click on each image to enlarge it. 
Picture
I noticed that he had a lot of acne (as teenagers tend to have) and so I went through and blended them into his natural skin tone. This is the kind of thing I mean when I say post-processing. I typically don't cover up moles or freckles unless specifically asked to simply because they make a person unique. I also happened to notice that he had a bad sore on his left hand. I went ahead and edited that as well. 
Picture
I went ahead and checked the rest of his skin for any noticeable blemishes. I have to stay zoomed in so that I don't miss it, so this takes time. 
Picture
After that I wanted to sharpen the image because it looked a little fuzzy on my screen. 
Picture
My next step is to go through and touch up his eyes. This is before I adjusted the opacity so that you can really tell what I'm doing. The whites of his eyes will not be quite as red as they were and you will be able to see the color of his eyes a little better. Many times I don't have to do this step, but for this image, I felt it needed it. 
Picture
Next I need to even out his skin color a little better, getting rid of the dark circles below his eyes and any other blemishes I may have missed. Yes, I know he looks plastic, this is after-all, before I have adjusted the opacity. 
Picture
As you can see, he now has his skin looking a little more realistic and a little less plastic. 
Picture
Remember I mentioned his senior ring? I want to make that pop a little more and be noticeable to the eye as well, so I'm going to pull out the color just a little. It seems intense here, but when I scroll back out, it won't be as extreme. 
Picture
I also want to pull the red out of this image some. It's not the color tone that I like for this overall look. 
Picture
I wanted to play with the shadows some as well and really pull the focus towards the center of the image. I haven't exaggerated it here just because it looks so dark and with low quality images, it's hard to depict. 
Picture
Now for the experimental part. Some images I can look at instantly and tell you what would look best. Others, I have to basically "try-on" different looks to see which I like best. I went with a sepia look first. However, with all the light and shadow behind him, I'm not sure if this is the best way to go with this photo. Let's try something different. 
Picture
This may be the way to go, but if it is then I'm going to need to dial down some of the hues in this photo. 
Picture
Yes, I like this look much better. However, there is still the problem of focusing the image in some more. After editing the hue, I realize I still need to add a little more shadow around the edges to help pull the eye towards the middle again. I don't want to overdo it though, or it will look too edited. I like my photos to have a much more natural look and not have black frames. 
Picture
And then the final step, the watermark. 
Picture
Now that image alone took nearly fifty minutes! Did you know that that is how much goes into an image?! 
Picture
Next time you think, gosh that photographer is charging a lot of money for just one hour of pictures, think about how much work goes into those pictures behind-the-scenes. That was one image and many clients expect anywhere from 20 to 100! I'm not going to do the math but if I did a bridal session for $100 and gave that bride 40 images, can you imagine the amount I got paid per hour?! So do your photographer a favor, don't request her/him to go back and re-edit, un-crop, or change their final work. It took them a long time to get there, and it comes off as rude or unappreciative. 

Well, I hope this blog post, helps to explain a little of what I and other photographers do after they see you from behind the lens. I've enjoyed giving you a little behind-the-scenes look at my post-processing. 

-Amy
0 Comments

How to be Photogenic

5/7/2013

0 Comments

 
So I read an article today about what it takes to be photogenic. I thought to myself, man this is so me! I'm so much better behind the camera than in front of it! But then it occurred to me, this would be great for any of my own potential clients or for those who really want to master taking good pictures! Here's the link I got it from:  http://www.wikihow.com/Be-Photogenic
It's really quite an interesting article! It's all posted below.
Having your photo taken can seem like a frightening endeavor, especially when it seems that you never look quite as good in portraits as you do in reality. This is a problem faced by many people, but is quite easy to remedy. Being photogenic is not an inborn talent, but an acquired skill that can be learned through practice. Try these methods of posing and tips for becoming photogenic and in no time you'll be the model-esq friend all your buddies brag about.

Focusing on Your Face
  1. 1. Clarify your skin. The focus of most portraits is the face, so make sure that yours is in tip top condition. Modern cameras are able to capture the smallest of changes and textures of skin, which is both a blessing and a curse. Keep your skin clean and smooth by washing, toning, and moisturizing your face before having your photo taken. Doing this should be a daily morning/evening ritual but is especially important before a photoshoot.

    • If you wear makeup, make sure that your concealer and foundation are smoothly applied and match your skin tone correctly. Blend them slightly down your neck and near your ear lobes to create the most natural look.
    • Oily skin can ruin a photo by reflecting too much light. Use oil blotting sheets or tissue paper (actual tissue paper, not kleenex) to dab off excess oil on the T-zone of your face.
    • Use an exfoliator on your face to slough off any dead skin cells which make your skin appear dull and lackluster in photos. Use a sugar scrub or a rough facial soap the morning of your photos.

  2. 2. Focus on what makes you unique. One of the characteristics of photogenic people is their confidence in their appearance. Many times we get concerned about something wrong with our face; our freckles, the gap in your teeth, how squinty your eyes get when you smile. Instead of trying to hide those things, embrace them! You will look much more photogenic in your photos that way.

  3. 3. Show your emotions. It is easy to spot someone who is photogenic from someone who is posing; the former doesn't have to fake their emotions. Although getting your photo taken can be nerve-wrecking, don’t let it get in the way of your true feelings. Don’t create the smile you think you need, use your regular smile. The same goes with the shape of your eyes and the curve of your cheeks. The more you allow your natural emotions to show on your face, the better your pictures will look.

    • Always smile with your teeth, because you would never laugh at a funny joke with your lips together. True smiles show off a toothy grin, not tightly pressed lips. Keep your face natural by allowing a real smile to peak through.
    • When you are showing emotions your entire face is affected. Although many people associate a look of happiness with just a smile, your eyebrows, eyes, cheeks, and forehead are all affected equally as much. Make sure that you are allowing freedom of movement in your entire face.

  4. 4. Don’t look the camera straight on. As the old saying goes, “the camera adds ten pounds.” But it doesn't have to! Because the camera is using reflected light to convert a 3D object into a 2D image, the shapes of things are flattened and compressed. Looking straight ahead at the camera will show the fullness of your face and remove/reduce any natural shadows. Instead, turn your face slightly to the side to create natural highlights and shadows and slim the shape of your face.

  5. 5. Adjust the angle of your face. The angle of your face is tied to the direction you are looking at the camera. Just as how you shouldn't look at the camera straight on, you also should not tilt your head up when taking photos. This will make your face look larger and get a good shot up the inside of your nose. Tilt your head slightly down and to the side for the most photogenic of looks.
Picture
Posing Your Body
  1. 1. Work your assets. Photogenic people have the magnificent ability of knowing what their assets are and the best way to work them. This goes hand in hand with knowing your physical weaknesses. What parts of your body are the most attractive, and which might be a tad more unflattering in photos? Do what you can to play up your best parts while turn those more negative aspects of your body away from the camera.

  2. 2. Turn away from the camera. Facing a camera straight on does the same thing to your body as it does to your face. Your body will become flattened in a photograph, so a shot from the front will show you from the widest angle and make you look extra round. Turn ¾ to show your body from an angle and create shadows and depth in your pose.
    • To slim your arms, put one on your hip and angle your elbow back and away from your body. Although you may feel silly doing it, there is a reason many celebrities adopt this pose - it is ultra flattering!
    • If you are sitting for the photo, turn so that the camera is at your side rather than directly in front of you. Bend your knees and stagger your legs slightly. If you choose to cross your legs, cross the leg closest to the camera over the top of the other.

  3. 3. Bend your joints. How often do you find yourself standing or sitting perfectly straight, with all your joints in line? Probably very rarely or never. Add both movement and a sense of natural poise to your photos by allowing your joints to bend slightly. This means that your elbows, wrists, knees, and ankles should all be comfortably bent. If it can bend, bend it!

  4. 4. Lean towards the camera. The way we see things works so that things that are closer are larger while things that are further away are smaller. In order to create the illusion of a small, sleek body, lean into photos slightly with your head first.

  5. 5. Do what’s comfortable. All the posing advice in the world can’t make you more photogenic if you aren’t comfortable with the changes. In the end, it is helpful to keep all the posing tricks in mind, but it is best to do whatever comes naturally to your body. Being photogenic means walking the thin line between acting incredibly natural like the camera is not there, and perfectly posing every inch of your body. The best way to reach this happy medium is simply to allow your body to fall naturally into its most comfortable positions.
Picture


Considering the Photos
  1. 1. Dress to impress. It is certainly hard to be photogenic if you are wearing your dirty sweatpants and torn-up sneakers. If you know you’re going to have your picture taken, choose outfits that photograph well. Neutral tones and muted colors work best because they simultaneously enhance your natural characteristics without distracting from you in a photo.
    • Avoid anything that hangs or drapes very loosely on your body, as this will look bulky and large in a photograph. On the other hand, don’t wear anything too tight as the flash from the camera will highlight every little flaw hiding under your clothing.
    • Don’t wear anything for photos that you wouldn't normally wear in real life. Your goal is to look like yourself at your very best; you can’t look like yourself if you’re wearing something totally out of your comfort zone or style range.

  2. 2. Find the light source. The source of light in your photo will greatly dictate the quality of your appearance in the end shot. A light source directly above you will give you dark shadows under your eyes, while one from the side will create bold background lines. Work so that your light source is in front of you and slightly above you. Whenever you can, take your photos in natural light near a window or outside.
    • The best lighting for photos occurs in the hour after sunrise and the hour before sunset. When you can, try to take your pictures during these times.
    • Although some photographers can use light metering to add brightness to a dark foreground, it is best to avoid taking pictures with your light source behind you. A light source coming from behind will darken your entire body and ruin a great picture.

  3. 3.  Choose a great location. Although the seat in your car or in front of your mirror may be the easiest places to perfect your pose and get good lighting, they don't allow for the most scenic of backgrounds. Being photogenic has a lot to do with working your surroundings in addition to showing off your facial and bodily posing skills. Take photos in a comfortable environment where you are the focus.
    • Busy restaurants and bars add a lot of noise to the background of a photo, taking the eye off you as the subject. If you must pose in a crowded area, blur the background to keep the viewers eye on you in the foreground.
    • If you are taking a group photo, try to insert yourself in the center of the group and away from the ends. The two people in the ends of a group shot will always appear the largest and are not often the focus of a picture.

  4. 4. Act confident. Confidence will show in a photo, and is the key to being photogenic. Even if you don't feel confident, act like it for the camera. The quality of your appearance in photos will greatly improve with a bit of personal knowledge that you look good, and that your photos will turn out great because of it.
  • Pretend like you're laughing. Often, this creates an effortlessly natural smile. Right before the camera flashes, pretend like you just saw something funny, or you were just told a joke!
  • If taking your own photos, on a webcam, phone camera, digital camera or something else, this takes practice. You'll need to learn the correct angle you want to take it at, so you can move your hand to the position.
  • Practice smiling in front of the mirror. In no time you'll know which smile looks fake and which is the most flattering. Learning how your face moves will help when someone grabs for the camera. Smile using your top row of teeth: it may feel unnatural but a smile with both rows of teeth can easily look fake.
  • Study pictures of models and other photogenic people. If appropriate for your personality, experiment with mimicking their poses and angles.
  • Avoid saying "cheese" while looking at the camera. This can lead to forced-looking smiles.
Picture
0 Comments

Photographing Christmas Trees

12/10/2012

0 Comments

 
Picture
Getting the perfect picture of your christmas tree can be much harder than it looks! Never fear though! A great photographer, Elizabeth Halford has shown us how it's done! Interested? Check out her helpful tips here > http://www.elizabethhalford.com/photography-tutorials/photographing/how-to-photograph-your-christmas-tree-how-to-get-twinkle-bursts-of-light/


This was my attempt at her tips. Not quite as great as hers but a work in progress. 

Don't forget to check out the rest of my blog posts for other helpful hints!

0 Comments

Photographing in the Rain

7/8/2012

0 Comments

 
Photographing in the Rain: How to get Great Photos While Protecting Your CameraPaul Cook found @ http://www.tocofi.com/how-to-photograph-in-the-rain/ 
Picture
Most photographers do not like taking pictures on a rainy day because of the problems that arise in their images and camera. Unaware to many of them is the breath-taking world that exists during the rain.

The rain provides photographers an opportunity to let their creativity run wild and capture some of the most stunning pictures. Many professionals consider photography in the rain to be a form of fine art photography as it requires skill and patience to capture remarkable images.
Picture
Picture
Photographing in the rain is very exciting. Photographers are able to capture shapes, shadows and colors that cannot be captured on a normal sunny day. For example, raindrops hitting the surface of an object, raindrops falling, rain falling onto petals and leaves, water droplets on grass, the different reflection and colors cast by wet objects. These are only some image ideas that you can undertake in your photo project when it’s raining.

Taking photos in the rain can be a bit tricky. Images can come out blurred if certain photography techniques are not used. To get great looking photographs in the rain, follow the tips mentioned below.

Adjust Shutter SpeedIn the rain, the DSLR camera’s shutter speed needs to be fairly increased in order to prevent the images from becoming blurry. Depending on the intensity of rain, the shutter speed should be at least 1/250 or higher.  Sometimes that can be hard to achieve and get a well exposed photo, but that is the fun of photographing in the rain.  Sometimes you get moody darker photos.  It really all depends on what you want to photograph.

ApertureSet the camera to use the aperture priority mode. Under this mode, the pictures will come out in more depth and with clearer light. Ideally, a wide camera aperture (f/4 or f/1.4) should be used when taking photos in the rain.

Macro ModeTurning on the macro mode on the DSLR camera is a great way to get interesting and captivating photos while it’s raining. This mode is ideal if close-up photographs are going to be taken. For example, taking a photo of a blade of grass with water droplets in macro mode will bring out sharper and clearer color. Make sure that the background is blurred out so that the viewer focuses on the object you captured.

When photographing in the rain, it is equally important to protect camera equipment as you would protect yourself. Camera equipment is very sensitive. Although a few droplets of water will not do any harm, prolonged exposure under the rain without any protection can damage the camera.

Below are a few tips that can help protect the camera when photographing in the rain.

Change Lenses under Shelter-
Changing the lens while under the rain can cause water to seep into the camera housing and cause damage. When the camera lens needs to be changed, look for shelter. This way, the camera is protected and you get a moment to dry your hair.

Wear a Raincoat-
Place the camera under your raincoat whenever you are moving around to find a photo location or if the camera is not in use.

Waterproof Casing-
If you plan on taking photographs in the rain, purchasing waterproof housing for the camera is essential. The housing will stop any water from seeping into the camera. It will also help to somewhat improve picture quality as the lens will be under the casing. A simple wipe to the lens area of the casing with a dry cloth will help bring out clearer images.

Lens Shade-
Typically a Lens shade is used to prevent glare and sunlight from affecting image quality. These shades can also be used to keep rain off the camera lens so that you can capture blur-free pictures in the rain.

Digital photography in the rain maybe a little tricky but the quality and creativity of the images are well worth the trouble.

http://www.thephotoargus.com/tips/great-tips-for-shooting-in-the-rain/

http://electronics.howstuffworks.com/how-to-capture-rain-in-photography2.htm

http://www.cambridgeincolour.com/tutorials/camera-exposure.htm

0 Comments
    Picture

    Author

    So I'm Amy! I am a elementary and jr. high teacher who also happens to LOVE photography! 

    Archives

    February 2015
    January 2014
    September 2013
    August 2013
    May 2013
    December 2012
    November 2012
    August 2012
    July 2012
    June 2012
    May 2012
    February 2012
    January 2012

    Categories

    All
    Angles
    Autumn
    Backdrops
    Camera Settings
    Candid
    Christmas
    Clients
    Clothes
    Encouragement
    Equipment
    Family
    Food
    For Photographers
    Funny
    Group Shots
    Holiday
    How To
    Lens
    Lighting
    Location
    Other Blogs
    Outfits
    Photographer
    Props
    Spring
    Subject
    Tips
    Wedding

    RSS Feed

Powered by Create your own unique website with customizable templates.